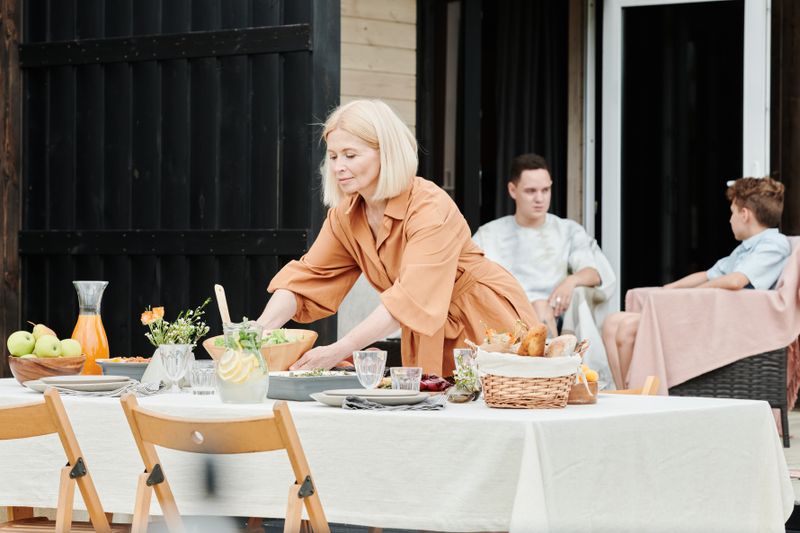
Start with your tablecloth or runner
Everything sits on top of your linen, so this goes down first. A tablecloth should hang evenly on all sides — about 30cm drop is the classic standard for a dinner party. Less for casual, more for formal.
If you're using a runner instead of a full cloth, centre it lengthways down the middle. Runners look best when they overhang about 15–20cm off each end of the table.
Tip: Linen wrinkles are completely fine and add character. If you want crisp, lightly mist with water and smooth with your hands while the fabric is still damp — no iron needed.
Place your charger plates
Charger plates are the large decorative base plates — they never hold food directly, they just anchor the place setting and add a layer of richness. Centre each charger about 2.5cm from the edge of the table.
Space place settings evenly — ideally at least 45cm between each centre point so guests aren't elbow to elbow. Step back and check the spacing looks even before you continue.
Skip chargers if: your table is small, the vibe is relaxed, or you just don't want the extra washing. They're beautiful but completely optional.
Stack your plates in order
For a dinner party: dinner plate on top of the charger, a side plate to the upper left for bread, and if you're serving a starter at the table, a starter plate or bowl sits on top of the dinner plate.
For everyday dining, one dinner plate per person is perfect. The rule is simple: plates go in reverse order of use, so the first course sits on top.

The cheat code: Neutral white or cream plates work with literally everything. If you only buy one set of plates, make them a simple matte white.
Lay your cutlery from outside in
The golden rule: work from the outside in as courses progress. Forks on the left, knives and spoons on the right, blade of the knife always facing the plate.
For a simple dinner: one fork left, one knife right, one spoon to the right of the knife. Dessert cutlery goes horizontally above the plate — fork pointing right, spoon pointing left.
The polish trick: Line up the bottoms of all cutlery pieces so they're perfectly level. This one detail makes the whole table look more considered without any extra effort.
Set your glasses above the knife
Glasses sit above and to the right of the dinner knife. If you're serving both water and wine, the water glass goes directly above the knife and the wine glass sits to its right at a slight diagonal.
For a relaxed dinner party, one beautiful glass per person is completely fine — and often looks better than a crowded row of three. More glasses add visual drama but also more to wash.
Pinterest tip: Tinted or coloured glassware photographs beautifully and adds personality to a tablescape without any extra effort. Sage green and amber are the most-searched shades right now.
Fold and place your napkins
Napkins can go on the plate, to the left of the forks, or folded into a glass for drama. For a dinner party, a simple fold placed on the plate looks effortlessly elegant — no elaborate origami needed.
For linen napkins: a loose rectangle fold or a simple organic tuck always looks better than a fancy swan. The slightly imperfect fold reads as intentional and relaxed.
The upgrade: A napkin ring adds instant polish. Use rattan rings for a casual table, brass rings for something more elegant. Both cost very little and make a noticeable difference.
Add your centrepiece last
The centrepiece goes in last so you can see how much room is left. The key rules: low enough to see over (keep it under 30cm tall for a dinner party) and odd numbers of vessels always look better than even.
Three small bud vases of different heights with a few stems each always beats one large arrangement. Place candles around the centrepiece — not in the middle — for the most photogenic result.
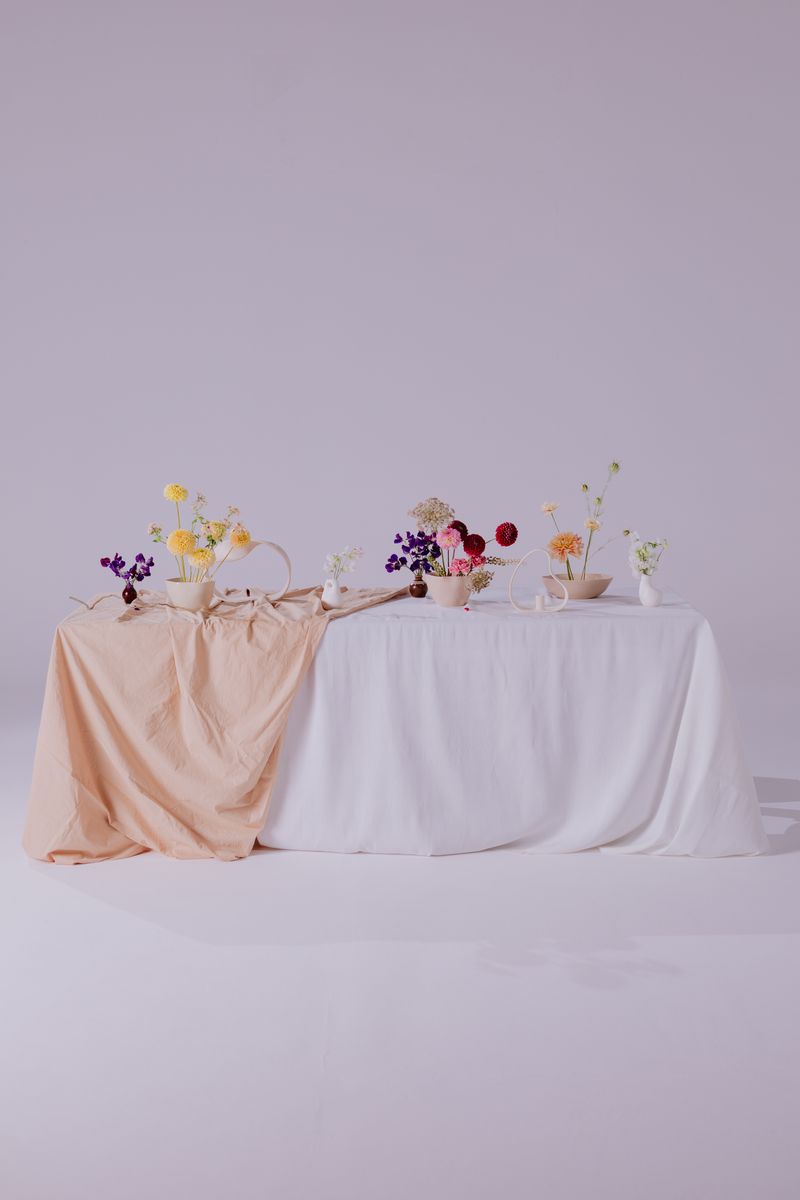
The no-fail combination: 3 ceramic bud vases in different heights + 2 brass taper candle holders with ivory tapers. Works in every season, photographs in every light, costs under $80 total.
Step back, adjust, then light the candles
Stand at the end of the table and look down its length. Check that place settings are evenly spaced, that the centrepiece doesn't block sight lines between guests, and that nothing is too close to the edge.
Then check the practical things: is there butter on the table? A jug of water? Salt and pepper? These small functional details matter as much as the beautiful ones.
And then — the most important step of all — light the candles. Everything looks better by candlelight. Even a simple table becomes genuinely magical the moment the flames are lit.
Last check: Take a photo before guests arrive. You'll want to remember it — and if it looks good in the photo, it'll look great in person.